Dutch Baby Pancake with Apple Filling

中文: 铁锅苹果薄饼

The Dutch baby pancake is one of our favorite Saturday and Sunday Brunches.   When it is baking in the oven, I can take my time to make coffee, sunny side up eggs, and pan-fried bacons. Isn’t it wonderful? O(∩_∩)O~ 

DSC_9817 3 copy.jpg

Ingredients

2 eggs
1/2 cup whole milk
1/2 cup all purpose flour
1 teaspoon sugar
1/4 teaspoon vanilla exact
1 tablespoon vegetable oil


Directions

Preheat oven to 425F/218 C.  

You can either preheat an 8 inches cast iron skillet in the oven or on the stove.  Either way is ok. 

Add eggs, flour, milk, sugar and vanilla exact to a blender container; blend on high speed for 20 to 30 seconds or until the batter is runny and smooth.

Add vegetable oil to preheated cast iron skillet, swirl the pan so that the oil can evenly coat the bottom.  Pour in the batter.  Bake it in oven for 22 to 25 minutes, or until the whole pancake is puffy and golden brown. 

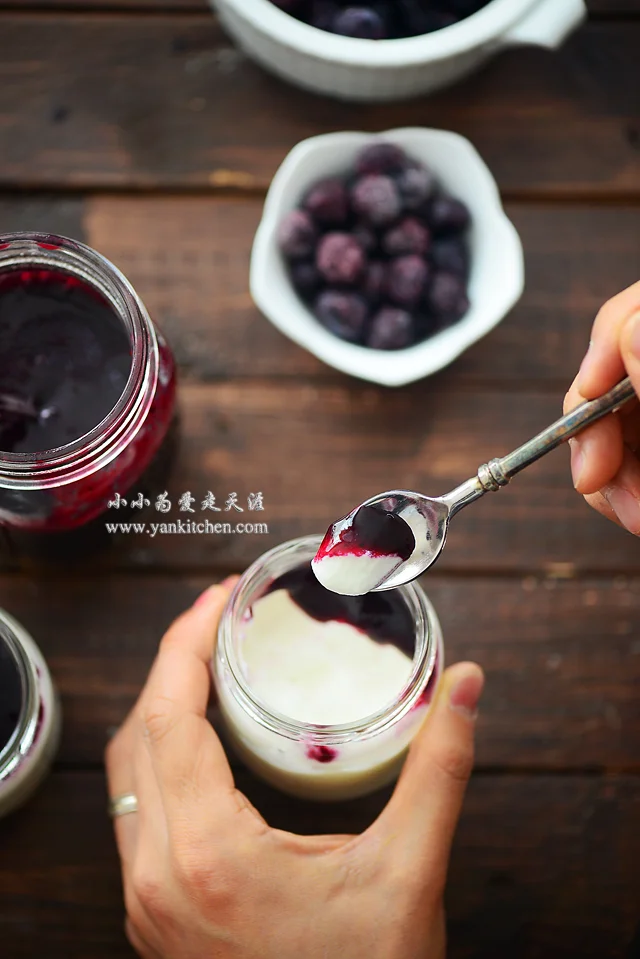
The pancake will fall after being out of oven, so that the center is perfect of filling.  I love to fill it with blueberry sauce or apple.


Ingredients for apple filling

2 to 3 medium size apples (I use the spy apples I got from farmer market.  They are tart and sweet with crunchy texture, which is perfect here.)
1/3 teaspoon ground cinnamon
1/4 to 1/3 cup packed brown sugar (use more if prefer sweeter taste)
1 teaspoon lemon juice
1/2 to 1 teaspooncorn starch
2 to 3 tablespoons water
powder sugar to sprinkle on top (optional )

Directions

Peel and core the apples. Cut into bite size pieces.  Add apple along with ground cinnamon, brown sugar, lemon juice and water to a medium pot.  Cook over medium high heat for about 10 minutes.  Stir constantly to prevent burning at the bottom.

In a small bowl, combine corn starch and 1 to 2 tablespoons water, whisk well and add to apple while stirring.  Cook for another couple minutes, remove from heat and pour onto Dutch baby pancake.  Sprinkle with powder sugar and serve immediately.  

It tastes very much like popover.  Yum! ~O(∩_∩)O~

mooncakes with red bean and lotus seed fillings

Mid-autumn Day is a very important traditional holiday in China.  It is like thanksgiving to American people.  It is the day that whole family and close friends get together and celebrate.  The moon on this night is said to be the brightest of the whole year.  So it is also a tradition for the Chinese people to admire and worship the moon after dark.

Of course we don’t worship the moon empty handed.  Mooncakes have been part of this tradition for thousands of years.  At first they were round shape to resemble the shape of the moon, which also why they were named mooncakes.  The square ones have been developed and they become my personal favorite.  I made most of my mooncakes with a square mold. 

The making of mooncakes is very labor intensive.  I start with making syrup weeks before the day, and I also make the cake fillings and the dough from scratch.  It is well worthy of the time I spent.

I would post the detailed recipe later. It took me a long time to make them from scratch and may take even longer to write down every single detail.  If you never had these before, and you are curious about what they taste like or interested in Mid-autumn Day tradition, I would simply just suggest you buy a box from Asian grocery store.

The syrup I made way before the holiday

Red bean paste filling and lotus seed paste filling; each of them is 30 g.

Each piece of dough is 18 g.

Press down the dough and wrap it around the filling.

Roll it into a round ball again.

Press with a mooncake mold, release it and there you have a perfect mooncake ready for the oven.

Place them a couple inches apart from each other in a baking pan lined with silicone matt.

Bake in an oven preheated to 375F/ 191°C for 5 minutes; take them out and brush egg yolk wash on the top very gently; sent them back to the oven and bake for another 15 minutes or until they are gold brown. 

DSC_7901 2 copy.jpg

Let them cool to room temperature and store in an airtight container. 

The taste and flavor would be the best on second and third day.

I love to dress up my homemade snack with these cute little dessert bags.  Are they lovely and pretty? O(∩_∩)O~

Pumpkin Sweet Rice Cakes

中文:南瓜糯米饼

I have some leftover steamed pumpkin in the refrigerator.  I decide to make some Asian sweet rice cakes with it.  Pumpkin and sweet rice are also a perfect combination.  Sweet rice flour has a very mild nutty flavor, and pumpkin adds a delicate refreshing and rich flavor to the cakes.

Ingredients

1/4 steamed mini pumpkin
1 cup sweet rice flour (adjust the amount according the pumpkin flesh)
3 to 4 tablespoons sugar
1 teaspoon oil
2/3 cup sesame seeds
oil for pan frying sweet rice cakes


Directions

Remove skin from pumpkin, cut into small pieces and place them in a mini food processor.   

Process until you have pumpkin puree. A fork will do the work just fine if you don’t want to use a food processor here.


In a bowl, combine sweet rice flour, sugar, oil and pumpkin puree.  

Whisk with a pair of chopsticks until most dry flour is gone.  Transfer to a well-dusted wooden board and knead into dough.

Divide the dough evenly into 12 pieces.  Roll each piece into a small round smooth ball.  

Quickly dip the balls into water and roll over in the pan filled with white sesame seeds. 

Gently press them down.

Heat a cast iron skillet over medium low heat.  Add oil, and then add sweet rice cakes.  Cover and each side cooks for 4 to 5 minutes. 


They go well with coffee or tea. Enjoy!  O(∩_∩)O~

Sweet Rice Balls with Brown Sugar Syrup

I have some left over squash and a small purple sweet potato.  I know I can do something to make them awesome.  So I turn them into sweet rice balls with brown sugar syrup.

Sweet rice, or glutinous rice, is very popular in Asian area.  It can be used in so many savory dishes, and it also can be found in many sweet desserts too.  I have been told that American people don’t like anything made from sweet rice or its flour.  Well, according to my prior experience, I agree it is very true.  

Squash sweet rice cake balls

1 small slice of cooked Kabocha squash
1 cup of sweet rice flour
1/2 teaspoon oil
1 tablespoon sugar
milk (if needed)

Purple sweet potato sweet rice cake balls

1 small cooked purple sweet potato
1 cup of sweet rice flour
1/2 teaspoon oil
1 tablespoon sugar
milk (if needed)

Sweet red bean paste

1 package of red beans(6 oz, about 170 g)
1/2 cup oil
1 cup of packed brown sugar (use more if you prefer sweeter taste)
water for cooking red beans

* The red bean paste is available in any Asian grocery store.  The listed ingredients above can make 5 to 6 times of what is needed in this recipe.  I like to make red bean paste in a large batch and freeze the extra, so that I can just take as much as I need from the freezer and thaw it.

Brown sugar syrup

2/3 cup packed brown sugar
2 to 3 tablespoon water
2/3 cup soy bean flour


Directions

I love to cook with Kabocha squash.  It is sweeter and has better texture than other squashes. 

Peel the cooked Kabocha squash and purple sweet potato.  Use a fork to smash them.

In two separate bowls, add smashed squash and sweet potato, sweet rice flour, sugar, oil and milk.  Knead until they form two sweet rice doughs. 

For homemade version red bean paste, I soak the red beans in water overnight.  Cook them with enough water over medium low heat until beans get soft. Use a blender to blend the beans into fine smooth bean paste.  

Heat a nonstick pan over medium high heat.  Add red bean paste. You will have to keep stirring to prevent the bean paste sticking to the bottom of the pan.  Add oil and sugar in three batches.  Stir and wait until the red bean paste absorbs the sugar and oil before adding more.

Cook until the red bean paste feels firm to stir. Remove from heat and let it cool down. The whole process might take between 15 to 25 minutes.

I make one bowl of red bean paste.  I will divide and wrap up the extra and store it in freeze for later use. 

If you simply don’t want to go through all the trouble to make it from scratch, just pick up a couple bags of red bean paste in Asian grocery store.  They can come in handy when making many Asian desserts. 

Divide the sweet rice doughs into cherry size pieces and roll into small balls.  

Do the same to the red bean paste, just in smaller size.

With your thumb, push down each sweet rice cake balls, wrap in red bean paste and roll into a round smooth sweet rice cake ball again.  

Now it is time to prepare brown sugar syrup.

In a small pot, add both brown sugar and water.  Cook over medium heat until water evaporates and the syrup begins to bubble. Remove from heat and set aside. 

Bring a large pot of water to boil.  Add sweet rice cake balls.  Cook until they float. 

In a bowl, add 2/3 cup soy bean flour.

Add cooked sweet rice cake balls and shake the bowl so that they can be evenly coated with soy bean flour. 

Top with brown syrup and a pinch of white sesame.  It is time to enjoy! 

The brown sugar syrup adds ton of wonder flavor to these tiny sweet rice cake balls.

This one is made of squash.

Here is a purple sweet potato rice cake ball. 

Raspberry Frozen Yogurt

 中文: 树莓酸奶冰激凌

Well, I was actually planning on making ice cream.  But there was no eggs left in my refrigerator, so I changed to frozen yogurt, which turned out to be a great sweet surprise too.

When making ice cream or frozen yogurt, I always go with fruit jam instead of fresh fruits. Jams contain less water and are packed with more intense flavor.  They usually contain more sugar too.  All these help ice cream and frozen yogurt freeze beautifully without getting too much ice particles in them.

I use homemade yogurt and homemade raspberry jam and blueberry jam.  Store bought ones would work fine too.

For homemade yogurt:

 http://www.yankitchen.com/english-blog/homemade-blueberry-yogurt


Ingredients:

1 3/4 cups of plain yogurt
4 tablespoons honey
1/2 cup raspberry jam
1/4 cup blueberry jam


Directions

Freeze the ice cream for at least 24 hours before ice cream process.  Refrigerate both yogurt and jams for at 4 hours or overnight.   

Homemade version yogurt

Start the ice cream machine.  Add yogurt and honey.  Let the machine run for 15 minutes.

Add raspberry jam and blueberry jam.  Run the machine for another 5 to 10 minutes. 

Transfer the frozen yogurt to a glass container with lid.  Cover and freeze for 4 to 6 hours.  You can also serve it as soft served frozen yogurt right out of ice cream machine.  It is very good too. 


Thanks to the raspberry jam and blueberry jam, the frozen yogurt has this beautiful bright purple color and very intense berry flavors.  O(∩_∩)O~。。。

Enjoy!