Popovers with blueberry jam

中文: 空心松饼

DSC_6006 3 copy.jpg

I wrote this popover recipe a couple years ago.  It was one of our favorite weekend breakfasts back then.   And now it is still our top choice for weekend breakfast. O(∩_∩)O~

Sometimes my husband volunteers to make these popovers.  So that you should know it simple and easy it is!

DSC_6027 2 copy.jpg

With a cup of freshly brewed coffee, sunny side up eggs and a few crispy bacon strips, this is a perfect Sunday brunch. 

Ingredients:

2 large eggs
1/2 teaspoon vanilla extract
1/2 cup whole milk
1/2 cup all purpose flour
1 teaspoon sugar
a pinch of salt
melted butter or oil spray for greasing the baking pan


Directions

You will need a popover pan for baking.  Muffin pan doesn’t work as well as popover pan.  Trust me; I tried. O(∩_∩)O~

Place the popover pan in the center of your oven. Preheat the oven to 425F/218C.  It is important that the pan is preheated too.

In a big cup or bowl, add all the ingredients.

DSC_5935 2 copy.jpg

With a hand blender, blend all ingredients together until the batter is runny and smooth.  If you don’t have a hand blender, a regular blender would work just as well.

DSC_5959 2 copy.jpg

Get the popover pan out of oven, spray or brush with oil or melted butter.

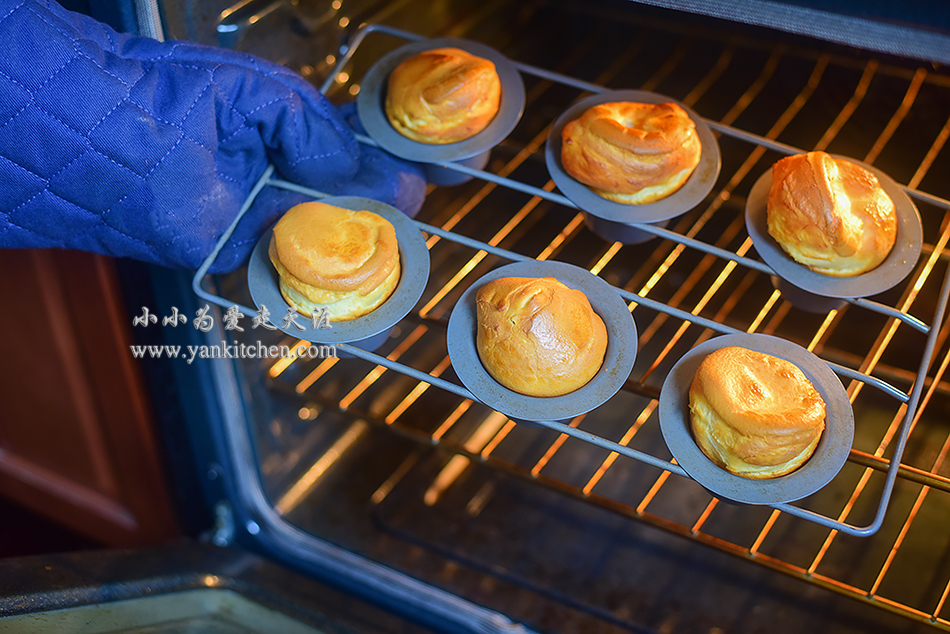
Pour the batter evenly and quickly.  Send back to oven and bake for 20 to 24 minutes or until popovers are puffy and golden brown.

DSC_5981 2 copy.jpg

It is fun to watch how they puff in the oven.

DSC_5999 2 copy.jpg

Serve immediately.  The moisture from inside of the popovers may make them mushy and chewy if you let them sit too long in the plate.

The recipe is for two people.  If you have more than two dining together, consider doubling the ingredients in the recipe.

We love to have the popovers with honey or jam.  They are so great together!

DSC_6012 3 copy.jpg

Chocolate Crepe Cake

I have been making several crepe cakes.  The most popular and tastiest one in my option is chocolate crepe cake.

The slight bitterness from dark chocolate adds more flavor and richness to the cake.  I am not a big fan of whipped cream.  Normally I have to get rid of the whipped cream icing when I eat cakes.  Whenever I order a sundae, I skip the whipped cream topping too.  But I enjoy every single bit this chocolate crepe cake.  Yes, it is that good! O(∩_∩)O~

DSC_0483 2 copy.jpg

Ingredients:

1 cup all purpose flour
1 tablespoon coco powder
1 teaspoon instant coffee
1 cup whole milk
1 large egg
2 teaspoons melted butter
1/2 teaspoon vanilla exact  (optional)
1/4 teaspoon salt
fresh strawberries for garnish
1 to 2 tablespoons coco powder for garish

Whipped cream filling:

1 1/2 to 2 cups of heavy cream
1/2 to 2/3 cups sugar
1/4 to 1/3 cup dark chocolate
1 to 2 tablespoons coco powder

Directions:

In a large glass cup or bowl, add flour, salt and coco powder.  And then add egg, melted butter, vanilla extract and milk.  Blend with a hand blender until the batter is smooth.  If you don’t have a hand blender, a regular blender will work just fine.

Heat one or two mini cast iron skillets over medium low heat.

My skillets measure 6.5 in diameter on the bottom.  I think it is the perfect size for a small crepe cake.

Spray them with a little bit vegetable oil and then wipe with paper towel.

Add 1 to 2 teaspoons batter.  With a crepe spreader, spread it quickly and evenly.

I use two skillets so that I can cut the preparation time in half.  And the crepes size will be uniform.

I make 28 crepes which means the crepe cake has 28 layers O(∩_∩)O~

Allow the crepes cool down to room temperature.

Meanwhile, I prepare whipped cream filling.

Add chocolate to a heat proof bowl.  Microwave on high for 25 to 45 seconds or until chocolate starts to melt.  Stir in instant coffee.  Allow it to cool down a little bit.

With a hand mixer, beat the heavy cream in a medium bowl just until it begins to hold it shape.  Gradually add the sugar in between.

Fold in chocolate with a spatula.

Refrigerate for at least 2 hours.

Place one crepe in the center of a cake stand.  Add about 2 tablespoons whipped cream.  Spread it out evenly with an icing spatula

Repeat the process until all the crepes are done.

Sprinkle the top with coco powder.  Top with strawberries.

Refrigerate for at least 3 to 4 hours before serving.

Time to enjoy!

Although the crepes and whipped cream are in the same color, you can still see the layers. O(∩_∩)O~

Want to take a bite? O(∩_∩)O~

Matcha Crepe Cake

DSC_3036 2 copy.jpg

The very first time I tried crepe cake was in Toronto’s st Lawrence market.  I tried so many delicious things all at the same time that I forgot how the cake taste like.  After I came back, I begin to make my own version of crepe cake.  It is not hard or intimidating at all, but you surely need to be very patient with it.  

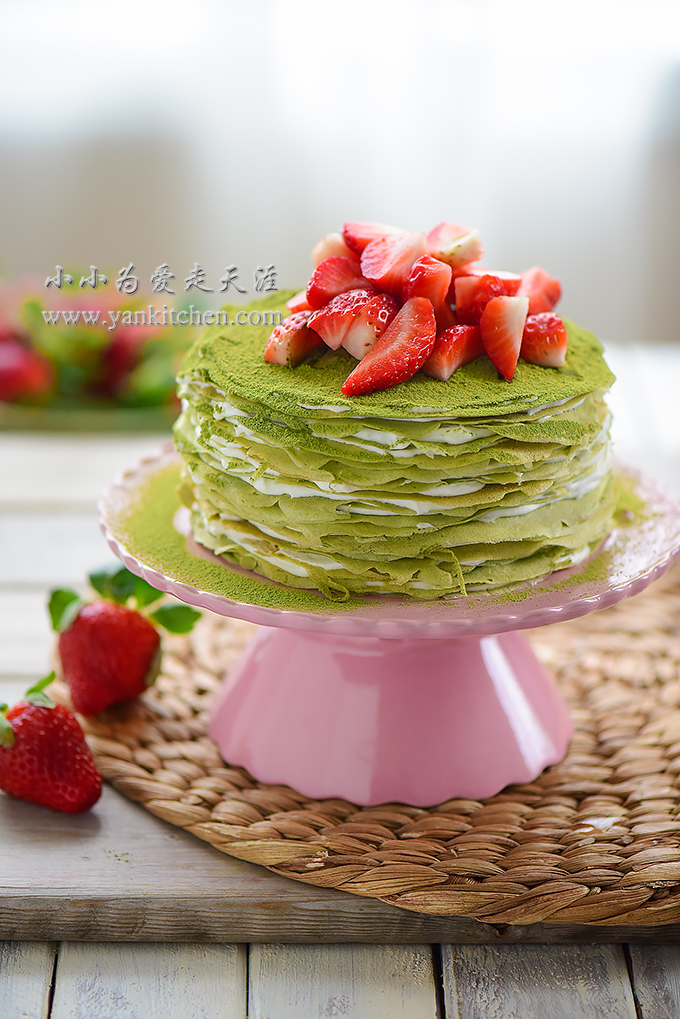
With two mini cast iron skillet and a custom made crepe spread from my husband, I present you, tad dah, a matcha crepe cake! O(∩_∩)O~


Ingredients:

1 cup all purpose flour
1 tablespoon matcha powder(or adjust the amount according to your own preference)
1 cup whole milk
1 large egg
2 teaspoons melted butter
1/2 teaspoon vanilla exact  (optional)
1/4 teaspoon salt
fresh strawberries for garnish
1 to 2 tablespoons matcha powder for garish

Whipped cream filling:

1 1/2 to 2 cups of heavy cream
1/2 to 2/3 cups sugar
1 teaspoon gelatin powder
2 to 3 tablespoons water


Directions:

In a large glass cup or bowl, add flour, salt and matcha powder.

Add egg, melted butter, vanilla extract and milk.  Blend with a hand blender until the batter is smooth.  If you don’t have a hand blender, a regular blender will work just fine.

Heat one or two mini cast iron skillet over medium low heat, spray them with a little bit vegetable oil and then wipe with paper towel.

My skillets measure 6.5 in diameter.  I think it is the perfect size for a small crepe cake.

Add 1 to 2 teaspoons batter.  With a crepe spreader, spread it quickly and evenly.

I use two skillets so that I can cut the preparation time in half.  And the crepes size will be uniform.

DSC_2934 2 copy.jpg

See how beautiful they are?  That is the reason I love cast iron pans!

I make 29 crepes which means the crepe cake has 29 layers O(∩_∩)O~

DSC_2942 2 copy.jpg

Allow the crepes cool down to room temperature.

Meanwhile, I prepare whipped cream filling.

Sprinkle the gelatin powder over water in a bowl.  Let it sit for a couple minutes and then microwave it for 20 to 30 seconds or until it completely melts.  Cool until it is no longer too hot to touch. 

With a hand mixer, beat the heavy cream in a medium bowl just until it begins to hold it shape.  Gradually add the sugar in between.

Add the gelatin solution to the whipped cream.  Whisk or fold until well combined.  Refrigerate for at least 2 hours.

DSC_2894 2 copy.jpg

Place one crepe in the center of a cake stand.  Add about 2 tablespoons whipped cream.  Spread it out evenly with an icing spatula.  You can add dice strawberries with whipped cream if you like.

Repeat the process until all the crepes are done

Sprinkle the top with matcha powder.  Top with sliced strawberries.

Refrigerate for at least 3 to 4 hours before serving.

Matcha and strawberries make a great pair, not only in colors but also in flavors too! O(∩_∩)O~

DSC_3036 2 copy.jpg

 Time to enjoy!

Cranberry Bagels

中文: 蔓越莓贝果

What I love about bagels is that they are soft and chewy at the same time.  Cranberry bagel is one of my favorite flavors.  I wrote this recipe a few years ago and it has been getting good reviews.  It is getting improved over the years. I also retake step by step photos when I am making them.

Ingredients:

3 1/2 cups bread flour (500g)
1 1/4 to 1 1/3 cups water
2 teaspoons yeast
5 tablespoons sugar (use more if you have sweet tooth)
1 tablespoon melted butter
1 teaspoon salt
1 cup of dried cranberry  (or raisins, dried blueberries, mango or any dried fruits of your choice)

For boiling the bagels:

1/2 gallon water
2 tablespoons honey
1 tablespoon baking soda
1 teaspoon salt

Direction:

Microwave the water on high for 30 to 50 seconds.  Add the water, along with 2 tablespoons of sugar and 1 tablespoon flour to the bread machine .  Stir them together.  Sprinkle yeast on top.  Let it sit for 5 to 8 minutes.

Add the remaining ingredients and start dough process. 

In five minutes, everything starts to come together.

The bread machine kneads for another 20 minutes.  The dough is very smooth and elastic now.

Wait until the dough doubles in size.

Transfer the dough to a well dusted wooden board.  Knead gently to get rid of big air bubbles.  Cover with plastic wrap and let it rest for 10 minutes.

Divide the dough into 16 pieces.  If you prefer bigger bagels, divide it into 8 to 10 pieces.

With a small rolling pin, roll each one flat.

Roll up from one end.

Tightly seal the seam.

Put two ends together and roll into a circle.

Lay the bagel dough pieces on the cookie pan lined with silicone baking mat.

Cover with greased plastic again.  Proof in the refrigerator overnight; longer proofing time at low temperature gives them finer texture.  If you don’t want to wait, just proof them at the room temperature for another 30 to 40 minutes.

Preheat the oven to425F/220 C

In a large pan, add water, honey, salt and baking powder.  Heat over high heat until the water boils.  Reduce the heat to simmer.  Add bagels.  Boil each side for 30 to 60 seconds depending on their sizes.

Drain well and put them back to the baking pan with silicone mat.

Bake in the oven for 16 to 20 minutes or until the bagels are golden brown

Now you have a batch of cranberry bagels freshly out of the oven!

I prefer to eat them just like this.

They are both soft and chewy at the same time.  And the light sweetness and tartness from cranberries is a really nice touch.

Or you can also slice them open.  Toast in a toaster for a couple minutes.  Spread with your favorite cream cheese or jam.

DSC_2672 2 copy.jpg

Tiramisu

中文: 提拉米苏

Tiramisu, even the name sounds so beautiful!  I love making tiramisu for parties.  It is always gone before you know it.  Sometimes I would make it just for myself.  With a cup of hot coffee and a good book in hand, it feels like heaven! O(∩_∩)O~

You can make it whatever shape you want.  Tiramisu in dessert cups are so cute and pretty.

Ingredients:

8 oz mascarpone cheese
2 egg yolks
1 1/4 cup heavy cream
2 tablespoons rum and coffee liqueur (recommend Kahlua)
2 shots of espresso

18 to 20 lady finger cookies
1/3 to 1/2 cup sugar (use more if you have a sweet tooth)
1 teaspoon gelatin powder
2 to 3 tablespoons water
unsweetened coco powder

Directions:

Get a 6 inch round or square cake pan ready.

Add egg yolks and half of the sugar to a double boiler bowl.  Beat the yolks and sugar until yolks turns creamy white color with electric mixer on medium low speed when the double boiler is simmering over low heat. 

Remove from heat and allow the yolks to cool down to room temperature.

In another medium bowl, add mascarpone cheese.  Beat with electric mixer until the cheese is smooth.  Add the cheese to yolk mixture.  Beat until well combined.

Sprinkle the gelatin powder over water in a bowl.  Let it sit for a couple minutes and then microwave it for 20 to 30 seconds or until it completely melts.  Cool until it is no longer too hot to touch.  Add to the yolk and cheese mixture.  Whisk until well combined. 

Replace the electric mixer with a clean pair of beaters. 

Beat the heavy cream in a medium bowl just until it begins to hold it shape.  Gradually add the other half of sugar in between.

With a rubber spatula, gently fold the whipped cream into yolk and cheese mixture.

Mix rum and coffee liquor and espresso coffee in a small bowl or deep plate.  

Deep the lady finger cookies in the coffee mixture for a few seconds.  And then layer them at the bottom of glass cake pan.

I didn’t find lady finger cookies in my local grocery store.  The closest ones I got are Stella Doro margrite cookies.  I did a quick online research when I was standing in the cookie aisle.  These cookies would work too.  You just need to soak them in the espresso mixture a little bit longer than the regular lady finger cookies.

Top with 1/3 cheese mixture and smooth it out with a spoon.

Add another layer of lady finger cookies. 

Top with cheese mixture again.  Repeat the process until the cheese and cookies are done.

Chill in the refrigerator overnight.

Sprinkle with shifted unsweetened coco powder on the top.

I make a square one and another two cute mini tiramisu in dessert cups.

My afternoon gets so much better with a piece of tiramisu and a cup of black coffee! O(∩_∩)O~