Chocolate Popcorns

I recently bought a new stovetop popcorn poper so that I can make our favorite chocolate popcorns. O(∩_∩)O~

Usually I make popcorn in microwave oven, (the recipe was posted here before).  I tried to make chocolate popcorns in microwave oven several times but never get good results.   With my new pan, it works like a charm! 

I love sweet popcorns, and chocolate popcorns are always our favorite flavor. 

Ingredients:

1/2 to 2/3 cup popcorns
2 tablespoons vegetable oil
2 to 3 tablespoon sugar (use more if you have a sweet tooth)
1/2 cup semi sweet or dark chocolate morsels

Directions:

Popcorns are available in almost any grocery store, farmer’s market and organic food stores.

Heat the popcorn pan  over medium high heat. 

Add oil and popcorn kernels.

Cover with lid

The popcorns begin to pop.  Add sugar through the hole on the top.  Meanwhile, keep swirling the handle on the top so that sugar will melt evenly and corns are heated evenly too. 

When the most corns pop, add chocolate through the hold on the top again.  Don’t forget swirl the handle so that chocolate can evenly melt and coat the popcorns. 

There you have a pot of freshly popped chocolate popcorns! O(∩_∩)O~ 

There is nothing more relaxing than watching a good movie on our sofa while eating these delicious chocolate popcorns。。。O(∩_∩)O~。。。

Chocolate Lava Cakes with Caramel Sauce

To be honest, I am not a huge fan of lava cakes, but my husband is.  So I make them occasionally for him O(∩_∩)O~

I add one square chocolate and one tablespoon homemade caramel sauce to each lava cakes.  So the lava is richer and creamier than before.  Chocolate and caramel complement each other in such a wonderful way that the cakes are so much tastier. 

Ingredients (for 4 lava cakes)

210 grams dark chocolate
1 cup confectioners sugar
1/2 cup butter
2 large eggs
3 egg yolks
1 teaspoon vanilla extract
1/2 cup all purpose flour
2 to 3 teaspoons coco powder (for the baking cups)
butter/ oil spray (for greasing the baking cups)
4 square dark chocolate bars
4 tablespoon caramel sauce


Directions

Preheat oven to 425F/218C

Beat eggs and egg yolks together.

In a large bowl, add butter and dark chocolate.  Heat the chocolate and butter in microwave oven or a double boiler until they completely melt. 

Add confectioners sugar.  Whisk them together. 

Add beaten egg mixture.

Whisk them togethe

Add shifted flou 

Whisk togethe

Grease the baking cups or ramekins with butter or oil spray.  Dust with coco powder .

The ingredients are for 4 lava cakes.  But this time I cut everything in half to make only 2 cakes. 

Spoon in the batter to fill half of the baking cups. Place one square chocolate bar in the middle of each cup. 

Add one tablespoon caramel sauce on top of chocolate.

Spoon in the rest of the batter.

Bake in the oven for 13 to 15 minutes.

Place them on a plate upside down.  Remove the baking cups.  There you have it, chocolate lava cakes with caramel sauce! 

Serve them immediately before they get cold and lava will not be runny any moreO(∩_∩)O~

Mini Cactus Brownie Cakes

I made these adorable mini cactus brownie cakes for a party.  Everyone was impressed!  Some people even thought they were real plants! O(∩_∩)O~

I made four different cactus plants.  Maybe next time I can try more other plants.

Ingredients:

For the cactus plants:

1/2 package of fondant
gel food coloring (green, brown, purple, pink and yellow)
fondant adhesive

For the pots:

1 1/4 cup all purpose flour
1/3 to 1/2 cup coco powder
1/3 teaspoon salt
1/2 cup butter, cut into small cubes
4 to 5 tablespoons cold water

24 mini brownies
Oreo cookies
chocolate ganache

Directions:

I make cactus plants ahead of time.  Divide the fondant into three parts.  Take two parts and add green food coloring.

Add little by little until you get the color you like.  Don’t add too much at one time.  It is hard to fix it if the color is too dark.

I also add some brown and purple colors to make them look more real.

With small cookie/fondant cutters, cut the fondant into different shapes and then make them into a complete plant.

I add a little more brown coloring to make some of them darker.

I also make some pink, yellow and white flowers.

After the plants are done, I move on to the pots.

Preheat the oven to 400F/ 204C

Add flour, coco powder, butter and salt to a food processor.

Chop them together while adding cold water from the top.

With a large rolling pin, roll the dough into a large thin flat.  Cut into 24 small round pieces. 

Flip a mini cupcake pan over.   Place one dough piece on each cupcake mold.  Smooth them out with a spoon or hand.   

With a fork, poke each of them a couple times on the bottom so that they will not pop up during baking process.

When I take the following pictures, I haven’t poked them yet.  Don’t be mistaken that it can be skipped.

Bake in the oven for 12 to 14 minutes.

Allow them to sit for a couple minutes before unmold them.

Now I have 24 dark “clay” pots.

With the same baking mold, I bake 24 mini brownies.

Transfer the brownies to the pots.   Use a sharp knife to even brownie tops.

Spoon 1 to 2 teaspoons chocolate ganache over each pot

Add Oreo cookies to a food processor, chop Oreo cookies into fine “dirt”

Sprinkle the pot with Oreo “dirt”

Don’t they look like really flower pots?

Top with cactus plants.

Now you have a mini cactus garden in a box!

Ok, time to take them out to fool some friends! O(∩_∩)O~


Asian sweet sesame cake balls

中文菜谱:开口笑

The sesame cake balls you see here rank number one on my childhood favorite list.  Cake balls are coated with sesame seeds and then deep fried to golden brown.  They taste crunchy on the outside, soft and fluffy and sweet on the inside.  They are the most delicious snacks I could think of as a child.

Ingredients:

2 cups of cake flour
1/2  egg
1/4  cup water
1 teaspoon oil
1/2 cup sugar (use more if you have a sweet tooth)
1 and 1/2teaspoon baking powder
1/4 teaspoon baking soda
1/2 cup white sesame seeds
1/2 cup black sesame seeds
oil for deep frying


Directions:

In a medium bowl, add water and sugar.  Whisk until the sugar dissolves.  Add oil and egg.  Whisk until well combined.

Shift together cake flour, baking powder, baking soda.

Add shifted flour to egg mixture.  Mix with a wooden spoon or a pair of chopsticks.

When everything starts to come together, transfer the dough to a well dusted wood board. Knead with hand until a dough ball forms.

Divide into 28 to 38 equal pieces.  I like to make them each between 20 g to 30g.

Roll each piece into a small dough ball.  Quickly dip in water and then coat with black sesame seeds.

DSC_6124 2 copy.jpg

Or you can also coat them with white sesame seeds.

Deep fry them until golden brown.

Bon appétit!

Tiramisu 2

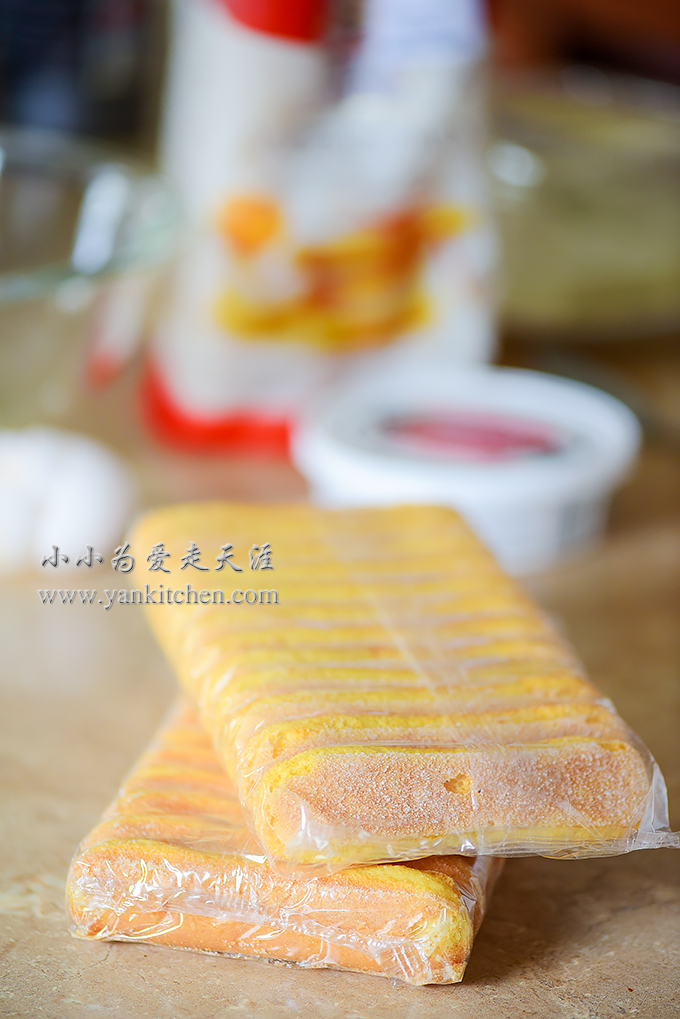
I finally found lady finger cookies on my last out of town grocery trip, hooray!  So I can make my beloved tiramisu again!

The lady finger cookies have finer texture.  They are crunchier and crispier than the cookie substitute I used before.  And they taste so much better this time.  So, my advice to you all, use the real lady finger cookies.  They make such a huge difference!

The tiramisu recipe is the same as I posted before with detailed step by step photos and instructions.


Ingredients:

8 oz mascarpone cheese
2 egg yolks
1 1/4 cup heavy cream
2 tablespoons rum and coffee liqueur (recommend Kahlua)
2 shots of espresso
1/3 to 1/2 cup sugar (use more if you have a sweet tooth)
18 to 20 lady finger cookies
1 teaspoon gelatin powder
2 to 3 tablespoonswater
unsweetened coco powder

Directions:

Get a 6 inch round or square cake pan ready.

Add egg yolks and half of the sugar to a double boiler bowl.  Beat the yolks and sugar until yolks turns creamy white color with electric mixer on medium low speed when the double boiler is simmering over low heat. 

Remove from heat and allow the yolks to cool a little bit.

In another medium bowl, add mascarpone cheese.  Beat with electric mixer until the cheese is smooth.  Add the cheese to yolk mixture.  Beat until well combined.

Sprinkle the gelatin powder over water in a bowl.  Let it sit for a couple minutes and then microwave it for 20 to 30 seconds or until it completely melts.  Cool until it is no longer too hot to touch.  Add to the yolk and cheese mixture.  Whisk until well combined. 

Replace the electric mixer with a clean pair of beaters. 

Beat the heavy cream in a medium bowl just until it begins to hold it shape.  Gradually add the other half of sugar in between.


With a rubber spatula or whisk, gently fold the whipped cream into yolk and cheese mixture.

 Mix rum and coffee liquor and espresso coffee in a small bowl or deep plate.  

Deep the lady finger cookies in the coffee mixture for a few seconds.  And then layer them at the bottom of glass cake pan.

DSC_5603 2 copy.jpg

Top with 1/3 cheese mixture and smooth it out with a spoon.  Add another layer of lady finger cookies. 

Top with cheese mixture again.  Repeat the process until the cheese and cookies are done.

Chill in the refrigerator overnight.

Sprinkle with shifted unsweetened coco powder on the top.

DSC_5710 3 copy.jpg

Remove from the mold.  I use a square spring form pan this time, so it is really easy to do so.

DSC_5719 2 copy.jpg

Bon appétit!   O(∩_∩)O~