中文菜谱:
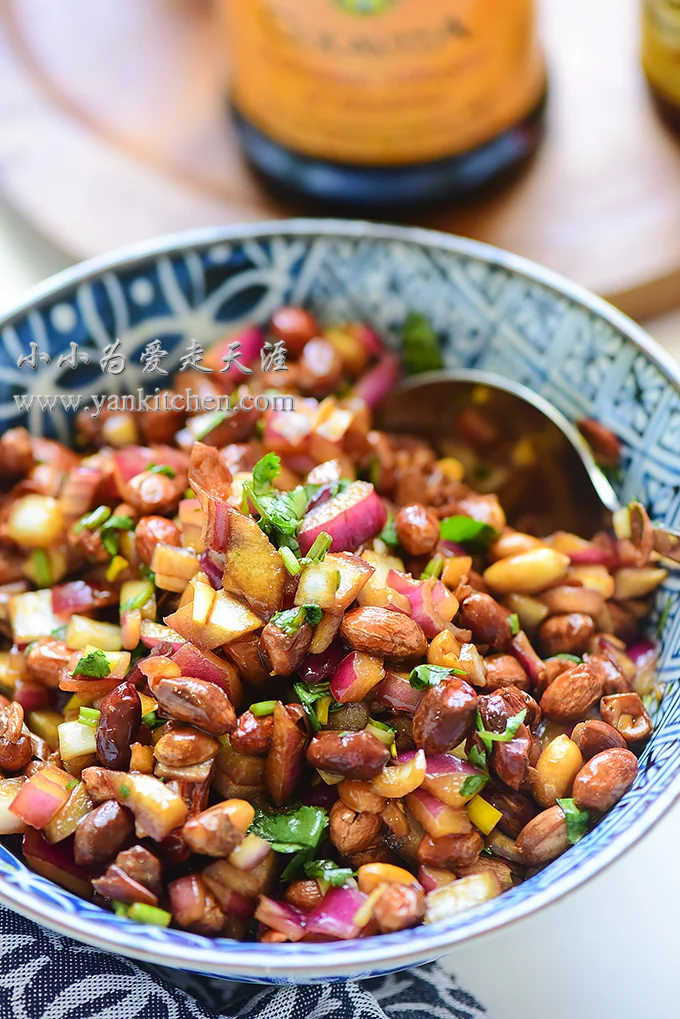
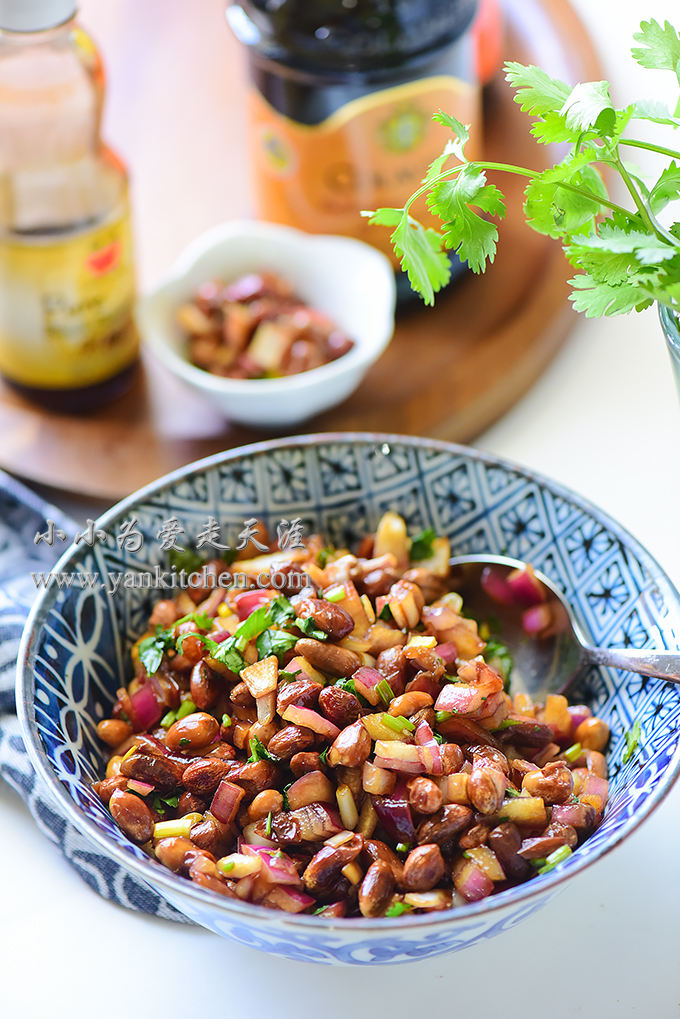
简单好滋味的老醋花生
Pickled peanut is a dish, well, an appetizer to be exact, very popular during hot summer time across mainland China. It is extremely simple and easy to make. Just toss roasted peanuts and chopped onion, along with vinegar and some other seasonings. And then wah-lah… you have a refreshing and crunchy peanut appetizer!
It sounds easy. But it will take a few tries to achieve great flavors. And the variations are limitless. You can add celery, cilantro, chili peppers… And every family has its own seasoning recipe too. All they have in common are peanuts, good vinegar and chopped onion.


Ingredients:
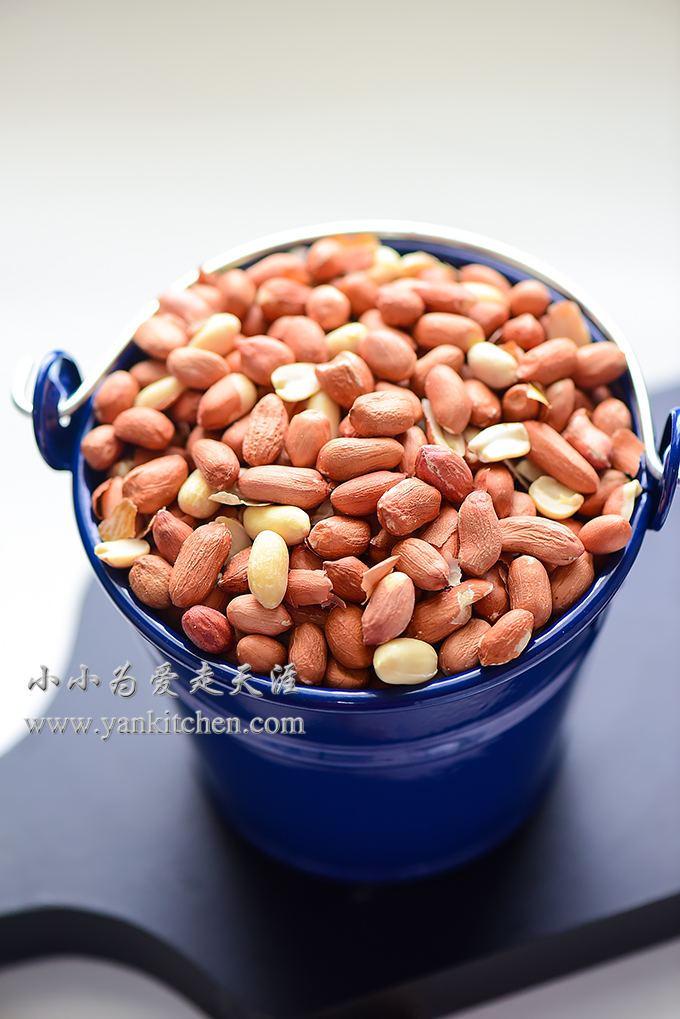
1 cup raw peanuts
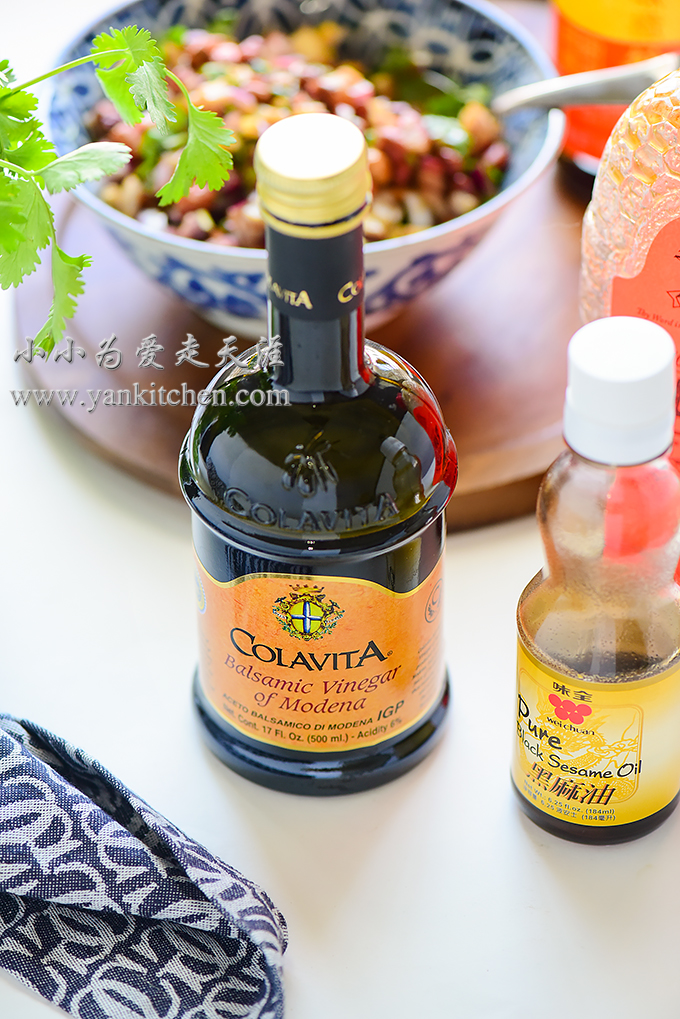
3 to 4 tablespoons balsamic vinegar (go with aged vinegar if you have one on hand )
2 teaspoons sesame oil
1 to 2 tablespoons honey (or use more or less to taste)
3 to 4 tablespoons soy sauce
chopped cilantro
1 medium sized onion, peeled and chopped
salt to taste
Directions:
I love peanuts with that red thin layer of skin on. The ones without it will taste just fine too.
Preheat oven to 350F/177C
Spread peanuts on a baking sheet. Bake in the oven for 8 minutes. When time is up, turn off oven heat. Leave the peanuts in the oven until they are cooled down.

Peanuts will be very crunchy when they cool down.

I have been using this vinegar for years. The aged version tastes better. Whenever I see them on shelves, I would stock up O(∩_∩)O~
Add peanuts, along with chopped onion, cilantro and all the seasonings to a large bowl.

Mix well.
It can be served right after everything is mixed together. But the flavor would be so much better if you let it sit in the fridge for a few hours before serving.

A few hours later, color has dulled a little bit, but all seasoning s and flavors combine better and the taste is smoother and more harmonious.
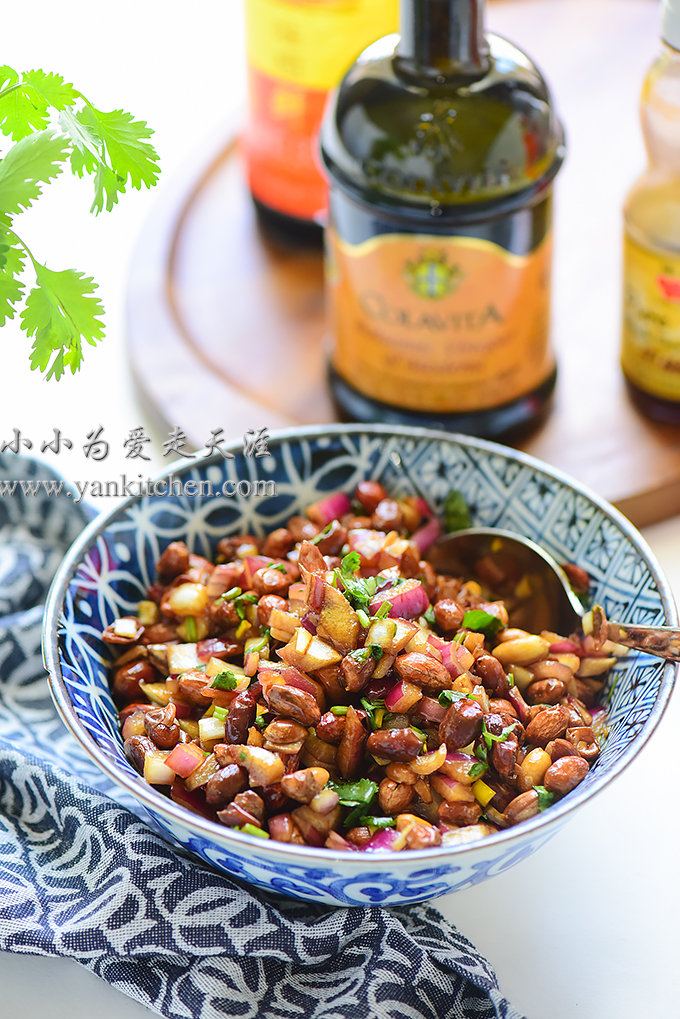
Peanuts are still crunchy. The contrast between crunchy peanut and juicy onion is well balanced and interesting. I just can’t get enough of it O(∩_∩)O~